Web HostingMost affordable shared hosting from TZS 9,100 per year
 Dedicated ServersExperience unmatched power and control with a physical server in Tanzania.
 WordPress HostingHigh-Speed, Tanzania-Optimized WordPress Hosting
 Windows HostingOptimized for Windows-based applications and websites
 cPanel HostingUser-friendly hosting powered by cPanel
 Email HostingProfessional Tanzanian email hosting for your .co.tz domain (Secure, reliable, and Swahili-supported)
 Reseller HostingLaunch your own hosting business with minimal technical requirements
 Affiliate ProgramEarn referral commissions by promoting our services
 DomainsFind and register available domain names in seconds
 .co.tzSecure the trusted .co.tz domain made for Tanzanian businesses.
 .tz DomainClaim the official .tz domain for national trust and recognition.
 .com DomainSecure the trusted .com domain for Tanzanian businesses.
 Supported Tlds (glTLDs and ccTLDs)Browse and register domain extensions from around the world
 Whois Lookup | Find Out Who Owns a DomainLook up domain ownership, expiry dates, and registrar information
 VPS
VPS VPS Hosting TanzaniaDedicated resources. Tanzanian performance. Full server control.
 Managed VPS TanzaniaNot a tech expert? Choose a managed Tanzania VPS.
What if your website suddenly disappeared without warning?
When your nameservers point to the wrong place, your site simply stops loading. Visitors can’t reach you, emails bounce back, and transactions fail. Everything that depends on your online presence comes to a halt all because of one small misconfiguration.
This problem often appears when you move your hosting or update your DNS settings. A single missed step can disconnect your domain from your website completely. For many website owners in Tanzania, that means lost traffic, missed sales, and unnecessary panic. The good news is that fixing it doesn’t require technical expertise.
Changing nameservers is easier than most people think. You only need to locate your domain settings, update the nameserver records from your new hosting provider, and save the changes. Once done, the internet will automatically direct all visitors to the correct server. With the right guide, this process takes just a few minutes.
Therefore, read this article to learn exactly how to change domain nameservers to point to another provider step by step.
Why Change Nameservers for a Domain
Your nameservers are like a GPS for your website. They tell browsers and email services exactly where to find your domain on the internet. When you change hosting, move your email, or use a new DNS service, your domain must point to the right place and that’s done by updating nameservers.
Changing nameservers it’s something every website owner will likely do at some point. For instance, below are reasons why you might need to change your domain nameservers:
- Hosting move: When you switch to a new hosting provider, your website files are stored on a different server. So, you need to update your nameservers to direct visitors to the new host so your site loads correctly. Without this change, users might still see your old website or face “site not found” errors.
- Use a managed DNS service: Managed DNS services like Cloudflare or Google Cloud DNS offer global networks that speed up site loading and protect against cyber threats. When you use one, you should replace your old nameservers with the ones given by that provider. This ensures faster resolution, improved uptime, and added security through features like DDoS protection.
- Point email to a new provider: If you’ve moved your email hosting, your new provider might require you to point your nameservers or DNS settings to their servers. This step ensures your domain’s email records like MX and SPF route messages correctly. However, always double-check your provider’s DNS requirements before making changes to avoid interruptions in email delivery.
- Make custom nameservers: Some users, especially web developers or resellers, prefer branded nameservers like ns1.yourdomain.com and ns2.yourdomain.com. This gives a professional appearance and helps manage multiple client domains from one place. To create them, you’ll register “glue records” with your registrar and assign them to your domain.
- Country-specific rules: If your domain ends with .tz, it’s managed under the Tanzania Communications Regulatory Authority (TCRA). The TCRA, through tzNIC, requires that .tz domains meet specific technical and administrative rules before activation. So, always check the official tzNIC policies before changing nameservers to stay compliant and avoid domain suspension.
How do I find my domain nameserver?
Before you can change your nameservers, you first need to know where your domain is currently pointing. This helps you confirm if it’s using the correct DNS settings and identify which provider is managing your domain.
Below are the main ways to find your current nameservers quickly and accurately.
1) Check Inside Your Domain Registrar Account
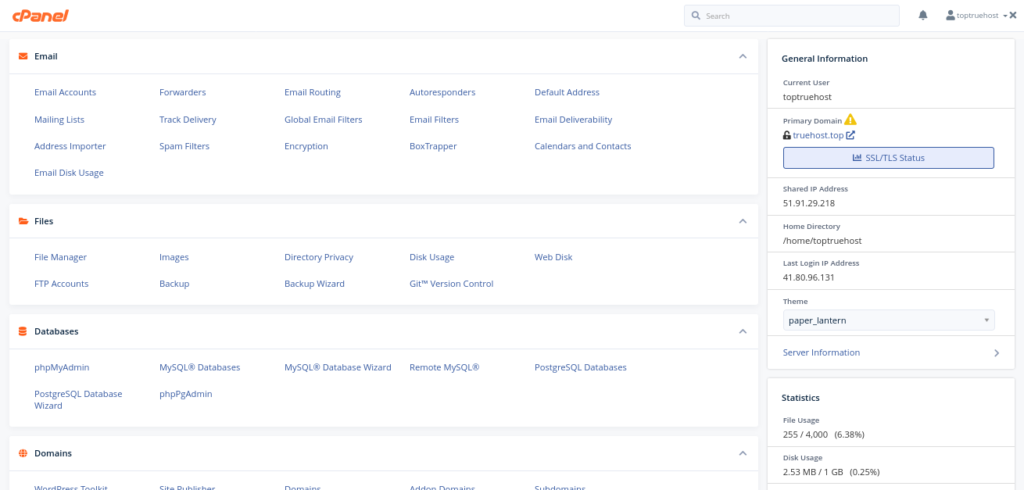
Start by signing in to the account where you registered your domain name. If your domain is registered with Truehost, log in to your client area and go to Domains > My Domains > Manage Domain. You’ll see a section labeled DNS or Nameservers showing the current entries, usually two or more, such as ns1.example.com and ns2.example.com.
This is the most reliable method since it displays the exact settings your registrar uses to direct your domain. If you recently purchased or transferred your domain, this is also where you’ll confirm whether your domain is using the default nameservers or custom ones provided by your hosting provider.
2) Use the ICANN WHOIS Lookup Tool
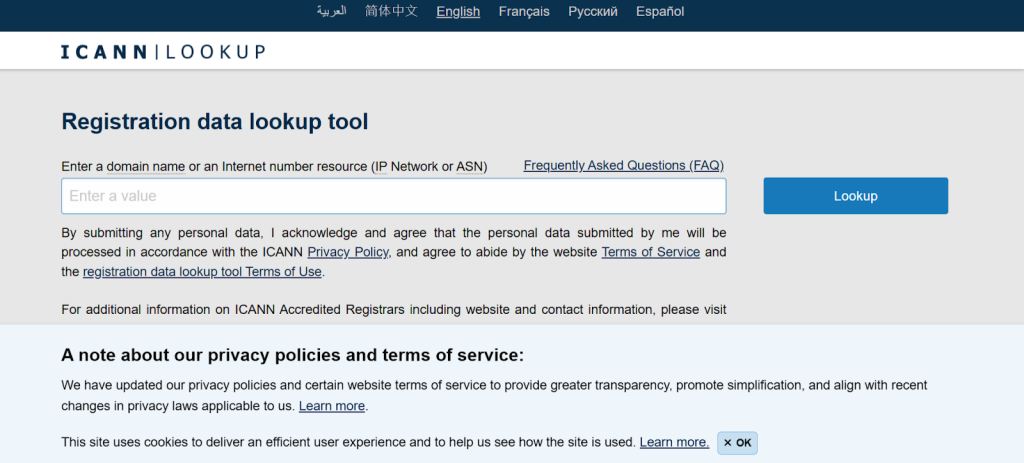
If you can’t remember where you bought your domain, or you no longer have access to your registrar account, the ICANN WHOIS Lookup is the best place to check. Enter your domain name for example, example.co.tz, and the system will show the registrar details, registration dates, and current nameservers.
This tool is managed by the Internet Corporation for Assigned Names and Numbers (ICANN), the global body that coordinates domain and DNS management. The information is public, factual, and updated regularly, making it a trusted source for domain data.
3) Use Public NS Lookup Tools
You can also use public DNS tools like DNSChecker.org or similar lookup platforms to see what nameservers the internet currently recognizes for your domain. Simply enter your domain name, choose “NS” from the record type list, and click Search.
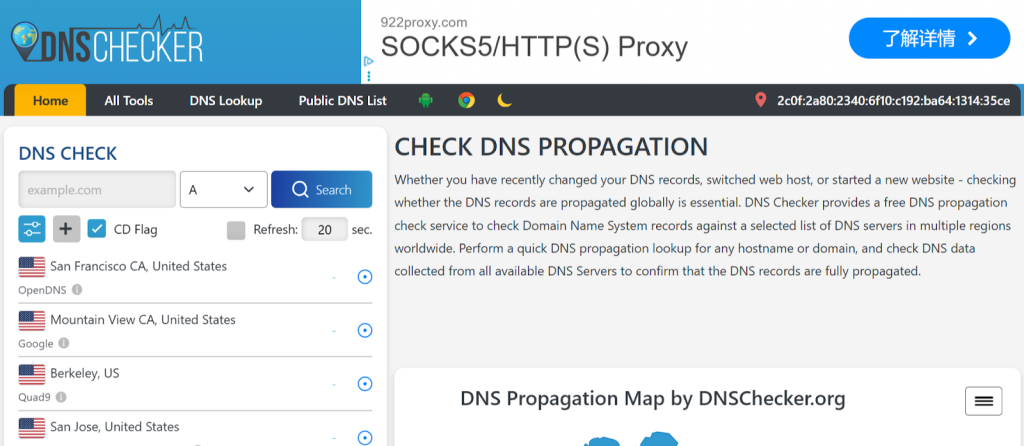
These tools show live DNS results from servers around the world. They help confirm whether your recent nameserver changes have propagated globally or if some regions are still reading the old settings. This is especially useful after you’ve updated your nameservers and want to verify that the new ones are active.
How to Change Nameservers and Point to a Another Provider
Every domain registrar has a slightly different dashboard layout, but the process for changing nameservers is almost identical across all platforms. Once you understand the basic flow, you can do it confidently whether your domain is registered with Truehost or any other accredited registrar.
Below is a clear step-by-step guide you can follow. Each step explains what to do, why do it, and what to expect next.
Step 1: Get the New Nameserver Details
Start by obtaining the nameserver addresses from your new hosting or DNS provider. These are usually listed in your hosting account dashboard or included in the welcome email after purchase. For example, the nameservers might look like ns1.exanpe.com or ns2.example.com.
Keep this information open or copied somewhere safe, as you’ll need to paste it exactly later. Otherwise, entering them incorrectly can cause your website or email to stop working temporarily.
Step 2: Sign In to Your Domain Registrar Account
Next, log in to the account where you registered your domain name. This could be your Truehost client area or another registrar if you purchased your domain elsewhere.
If you’ve forgotten your login details, use the password recovery option or contact customer support for help. You must have access to this account to make DNS changes as it is the control center for your domain.
Step 3: Open Your Domain Settings and Find the Nameservers Section
Once you’re logged in, locate the domain you want to update. Then, open the Manage Domain, DNS Settings, or Nameservers option. The exact wording varies, but you’ll usually find it under “Domain Management” or “Advanced Settings.”
In Truehost, for example, you can access it by navigating to Domains > My Domains > Manage Domain > Nameservers. Here, you’ll see the current nameservers assigned to your domain.
If you can’t find this section, check the registrar’s help center or search contact the customer support agent for quick help.
Step 4: Replace the Old Nameservers With the New Ones
In this section, select “Use custom nameservers” or “Set custom DNS.” Then, replace the existing entries with the new ones provided by your hosting company. Enter them carefully because even a small typo can cause resolution issues.
Thereafter, click “Save” or “Update” to save the changes.
Moreover, If your hosting provider has given you IP addresses for your nameservers, called glue records, those must also be added. The glue records are needed when your nameservers use your own domain, for example, ns1.yourdomain.co.tz.
Step 5: Wait for DNS Propagation
Once you’ve updated the nameservers, the changes must spread across global DNS servers, a process called propagation. This typically takes between 24 and 48 hours, though in some cases it can complete within a few hours or take up to 72 hours.
During this time, some users may still see the old version of your website, while others will already be redirected to the new one. This is normal. Avoid making additional DNS changes until propagation is complete.
Step 6: Verify Everything Is Working
After propagation, confirm that your nameservers are updated and your site is loading correctly. You can use public tools like DNSChecker.org or WhatsMyDNS.net to check your NS records from multiple global locations.
Also, open your website in a private or incognito browser window to make sure it’s showing the new version. If you’ve changed email settings too, test sending and receiving messages to confirm your MX records are configured correctly.
If anything seems off, go back to your registrar account to confirm that the correct nameserver values are in place and there are no typos or missing records.
Frequently Asked Questions (FAQs)
1) How do you point a domain name to a nameserver?
To point your domain name to a nameserver, log in to your registrar account, open the DNS or Nameserver settings, and replace the old nameservers with the new ones from your hosting provider. Save the changes and wait for up to 24 to 48 hours for global DNS propagation.
2) How do I add nameservers to a domain?
Go to your domain registrar’s dashboard, select “Use custom nameservers” and enter the nameserver details given by your web host. Some registrars may also ask for IPs if you’re setting up custom glue records. Save the changes, and the update will take effect within 1 to 2 days.
3) Is changing nameservers risky?
No, when done carefully, changing nameservers is safe and quick. The only main risks include brief website downtime or email interruptions if DNS records aren’t backed up.
So, always copy your current DNS settings before making changes, and double-check MX records if you use custom email.
4) How long before my site works after changing nameservers?
Nameserver updates usually take 24 to 48 hours to fully propagate worldwide. Some visitors may see your new hosting within a few hours, while others might still reach the old site during this period.
Final Thoughts
Changing nameservers it’s actually one of the easiest and most effective ways to take control of your website. Whether you’re moving to a faster host, setting up custom DNS, or improving email delivery, knowing how to update nameservers helps keep your online presence stable and accessible.
Before making any changes, always back up your current DNS records, confirm the new nameservers with your provider, and allow time for DNS propagation. Once the update spreads across the internet, your site and emails will load from the new server smoothly and securely.
At Truehost, you can easily update your nameservers, manage DNS records, and host your website on a fast, reliable server, all in one place. Ready to make the switch? Get started with Truehost today and keep your website online without downtime.