Web HostingMost affordable shared hosting from TZS 9,100 per year
 Dedicated ServersExperience unmatched power and control with a physical server in Tanzania.
 WordPress HostingHigh-Speed, Tanzania-Optimized WordPress Hosting
 Windows HostingOptimized for Windows-based applications and websites
 cPanel HostingUser-friendly hosting powered by cPanel
 Email HostingProfessional Tanzanian email hosting for your .co.tz domain (Secure, reliable, and Swahili-supported)
 Reseller HostingLaunch your own hosting business with minimal technical requirements
 Affiliate ProgramEarn referral commissions by promoting our services
 DomainsFind and register available domain names in seconds
 .co.tzSecure the trusted .co.tz domain made for Tanzanian businesses.
 .tz DomainClaim the official .tz domain for national trust and recognition.
 .com DomainSecure the trusted .com domain for Tanzanian businesses.
 Supported Tlds (glTLDs and ccTLDs)Browse and register domain extensions from around the world
 Whois Lookup | Find Out Who Owns a DomainLook up domain ownership, expiry dates, and registrar information
 VPS
VPS VPS Hosting TanzaniaDedicated resources. Tanzanian performance. Full server control.
 Managed VPS TanzaniaNot a tech expert? Choose a managed Tanzania VPS.
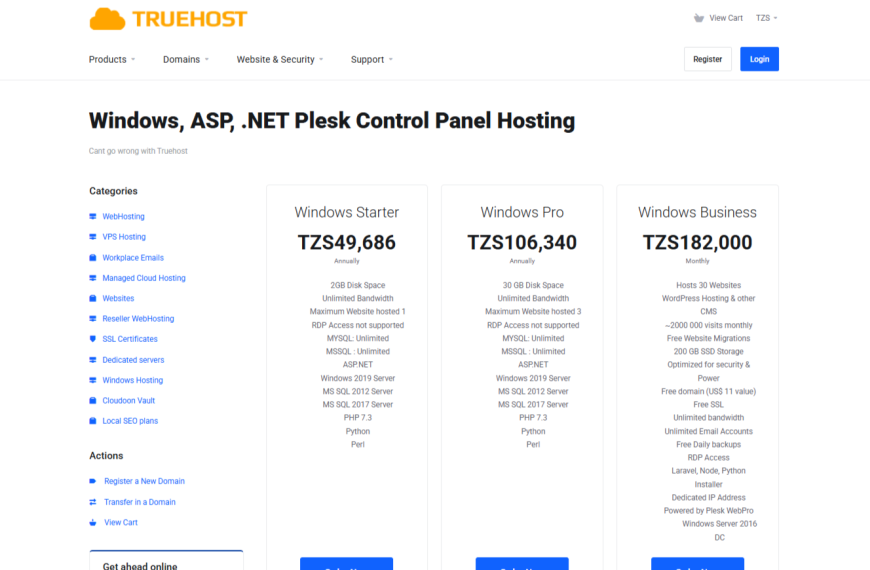
Your website is ready and now it’s time to put it online. If you’re looking for more control, stronger performance, and full support for Microsoft technologies like ASP.NET and MSSQL, then Windows hosting is your best option.
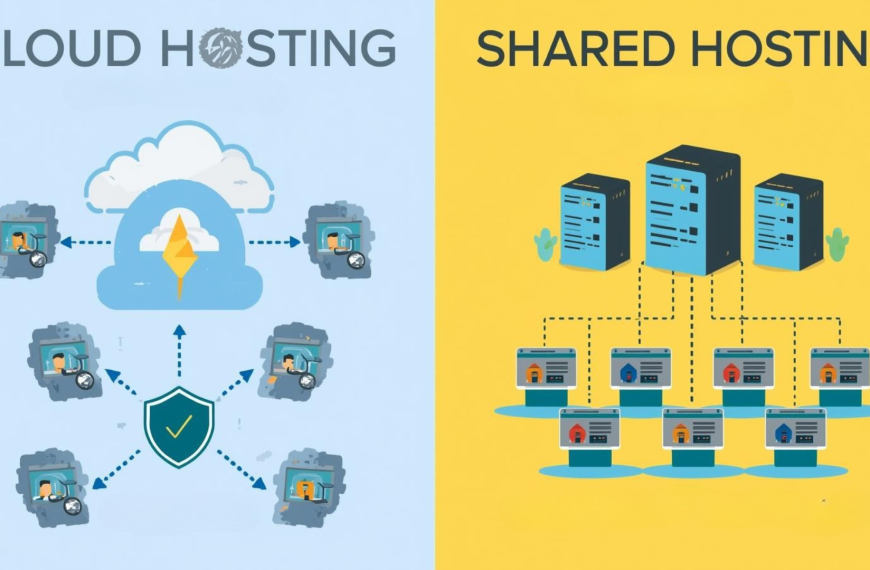
Unlike standard Linux hosting, Windows hosting in Tanzania gives you a familiar environment powered by Microsoft tools. You can easily integrate with .NET applications, manage your site through IIS, and customize settings to fit your exact needs.
For local businesses, developers, and organizations, it’s a reliable choice that combines flexibility with stability.
In this guide, you’ll learn step-by-step how to host your website on a Windows Server from setup and deployment to connecting your domain and keeping everything secure.
Why Choose Windows Hosting in Tanzania

Before jumping into the steps, let’s clear one thing. Why should you use Windows hosting in the first place?
If your website runs on ASP.NET, .NET Core, or Microsoft SQL Server (MSSQL), then Windows hosting is the perfect home. It’s built to support Microsoft technologies that many Tanzanian businesses use for their websites and systems.
Windows hosting also integrates easily with Plesk, one of the most beginner-friendly control panels for managing sites. And with local providers like Truehost, you get nearby servers optimized for Tanzanian traffic meaning faster page loads and less downtime.
How to Host a Website on a Windows Server: Step By Step
Hosting your website on a Windows Server may sound technical, but it’s easier than you think. Here’s how:
Step 1: Get a Domain Name

Every website starts with a name. Think of it as your digital address just like truehost.co.tz.
To buy one:
- Visit Truehost.
- Search for your preferred domain (for example, yourbusiness.co.tz).
- Once available, complete the purchase.
Tip: Stick to local extensions like .co.tz or .or.tz if your audience is in Tanzania. It builds trust and helps with local SEO rankings.
Step 2: Get Windows Hosting or a Windows Server

Now that you have a domain, you need a space to store your website’s files. That’s hosting.
You have two main options:
| Option | Description | Best for |
| Buy Windows hosting Get Truehost Offer | Truehost hosts your website on safe and fast servers. You just need to upload your files and you are good to go. | Beginners, small businesses |
| Host on your own Windows Server | You install and manage your own Windows Server which needs you to be tech-savvy. | Developers, IT experts |
If you’re new, hosted Windows plans from Truehost are easier. They come with a pre-installed Plesk control panel, Internet Information Services(IIS), and built-in security.
Step 3: Install Internet Information Services (IIS)

If you’re hosting from your own Windows Server (not using Truehost), you’ll need to download and set up IIS. This is the web server that delivers your website to the internet.
Here’s how:
- Go to your Windows Server Manager.
- Click Manage > Add Roles and Features.
- Choose Web Server (IIS).
- Complete the installation wizard.
Once done, IIS will act as the engine that displays your website to anyone who types your domain name.
Step 4: Upload Your Website Files
Next, it’s time to get your website files onto the server.
You can do this in two ways:
- Using Plesk (recommended)
- Log into your Plesk dashboard.
- Go to Files>Upload and choose your website folder (HTML, ASP.NET, or PHP).
- Hit “Publish.”
- Using FTP (File Transfer Protocol)
- Download an FTP client like FileZilla.
- Enter your server’s IP, username, and password.
- Upload all website files to the root folder.
Once uploaded, you should see your homepage when you visit your domain.
Step 5: Connect Your Domain to Your Server
If you got your hosting and domain from the same provider like Truehost, this is usually done automatically.
But if not, you’ll need to update your DNS settings:
- Log into your domain control panel.
- Go to DNS settings or Name Servers.
- Add the name servers provided by your hosting provider (for example, ns1.truehost.co.tz and ns2.truehost.co.tz).
Wait a few hours for the changes to take effect, a process called propagation. After that, your domain will point to your server.
Step 6: Secure Your Website with SSL
An SSL certificate is what gives your website the little padlock symbol in the browser. This shows visitors that your site is safe.
Most Tanzanian users now avoid sites without SSL. In fact, over 90% of web pages loaded in Chrome use HTTPS according to Google Transparency Report.
With Truehost, SSL is included for free. However, If you’re hosting manually, do this to secure your website with SSL:
- In IIS, open your site’s settings.
- Click Bindings > Add > HTTPS.
- Choose your SSL certificate and apply.
This encrypts all data shared between your visitors and your site, essentially if you collect payments or user info.
If you only need SSL without a full Windows hosting plan, you can easily buy affordable SSL Certificates directly from Truehost.
Step 7: Set Up Email Accounts
Professional websites need branded emails. Instead of using Gmail, set up an email like [email protected].
If you’re on Plesk, it’s simple:
- Open Mail.
- Click Create Email Address.
- Choose a name like “sales” and set a password.
Truehost’s Windows hosting packages include business emails for free, which can be synced with Outlook or your phone.
Step 8: Monitor and Maintain Your Website
Once your site is live, your job isn’t done yet. You’ll need to:
- Update your software regularly to prevent hacks.
- Check uptime and speed using tools like UptimeRobot or GTMetrix.
- Backup your data. Truehost Windows hosting business plan comes with automatic daily backups.
If you’re self-hosting on your own Windows Server, make sure to install security patches from Microsoft often. Otherwise, ignoring updates is like inviting hackers to a free open house and handing them the keys.
Common Mistakes to Avoid When Hosting a Website on Windows Server

Even the best setup can go wrong if you miss small but important details. Below are some common mistakes many people make when hosting a website on Windows Server and how you can avoid them.
| Mistake | Why it’s a problem | How to fix |
| Not using SSL | Visitors seeing “Not Secure” warnings and may lose trust | Get SSL from Truehost (It’s free when you buy hosting) |
| Wrong DNS setup | Domain won’t load or may connect to the wrong site | Double check name servers and DNS records |
| Skipping updates | Leaves site vulnerable to bugs and hackers | Enable automatic Windows and app updates |
| No backups | Risk of data loss in case of server failure | Use automatic or cloud backups |
Mistakes happen, but fixing them early keeps your website safe, fast, and reliable. Think of this table as your checklist. If you tick every box, your Windows-hosted website will run smoothly in Tanzania and beyond.
Hosting on Truehost: The Easy Way
If configuring your own Windows server feels too technical, there’s an easier path. Truehost simplifies everything so you are left to only publish your website or app. When you buy Windows hosting package you get:
- Pre-installed Plesk control panel
- Free SSL certificate
- Local 24/7 support in English and Swahili
- Automatic backups and strong firewalls
That means you spend less time fixing errors and more time running your business.
Frequently Asked Questions (FAQs)
1) Can I host a website on Windows Server at home?
Yes, you can host a website on Windows Server at home but it’s not ideal for public websites. Hosting from home in Tanzania requires a static IP, strong security, and reliable power and internet. A better option is using a hosting provider like Truehost, which already has servers and 24/7 uptime.
2) Do I need a domain name to host a website on Windows Server?
Yes. A domain name (like yourname.co.tz) helps users find your site easily. You can buy one from Truehost.co.tz, then connect it to your Windows Server using DNS settings.
3) Is Windows hosting good for WordPress websites?
It can work, but Linux hosting is usually better for WordPress. Windows hosting is perfect for ASP.NET and MSSQLwebsites. Also, If your website is built with Microsoft tools, Windows hosting gives better compatibility and performance.
4) What control panel can I use on Windows Server?
The best option is Plesk. It’s easy to use, beginner-friendly, and lets you manage files, databases, emails, and security in one place. Other options include SolidCP and MspControl, but Plesk is the most reliable.
Conclusion
Hosting a website on Windows Server in Tanzania doesn’t have to be hard. You’ve seen the steps. From getting a domain, setting up IIS, and uploading your files, to securing your site with SSL.
But if managing everything on your own feels overwhelming, Truehost has you covered. With Truehost Windows Hosting, everything is pre-configured. The server, control panel, and security setup. You also get 24/7 customer support ready to help in English or Swahili.
So why struggle with setup when you can get started instantly? Host your website with Truehost today and enjoy a fast, secure, and worry-free Windows hosting experience.